Hello Crafters,
Create the perfect combination of delicate florals and impactful statements using the brand-new Flower Power collection. In today's tutorial, DT member Christine uses soft pinks, vellum, sparkles, and glitters with gorgeous results.
Read on for a full step-by-step project tutorial, complete with full materials list. To view the product page for each individual product, simply click on the product name and you'll be directed to its dedicated page.

YOU WILL NEED:
- Flower Power collection:
- 8x8” Fancy Ovals metal die set
- Chloe’s Classics Volume 3 stamp set
- Pearl card – Crystal White and Rose Quartz
- Mirror card – Rose Quartz
- White 8”x8” card blank
- Floral Dreams 8x8” paper pad
- A4 Luxury Vellum
- Heat-resistant acetate
- Double-sided adhesive sheet
- WOW! clear embossing inkpad
- WOW! embossing powder – Sparkling Snow and Opaque Bright White Super Fine
- Sparkelicious Glitter – Crystallina, Chunky Crystallina, and Pink Perfection
- Sparklers – 12mm and 10mm
- Self-Adhesive Sparkles – Sparkling Silvers
- Foam pads on a roll
- Chisel-tip glue pen
- Pinflair 3D glue gel
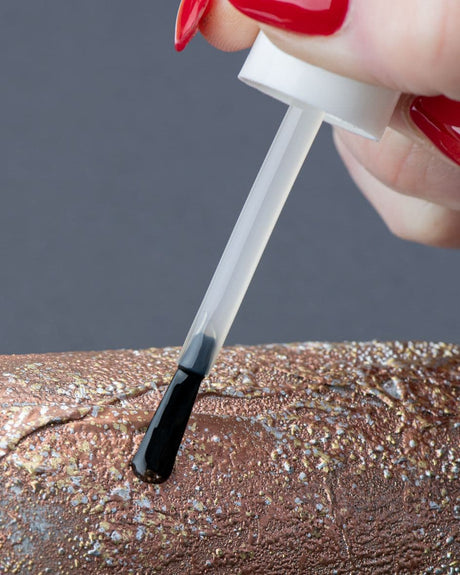
- Art Glitter Dries-Clear PVA glue
- Pink marker pen
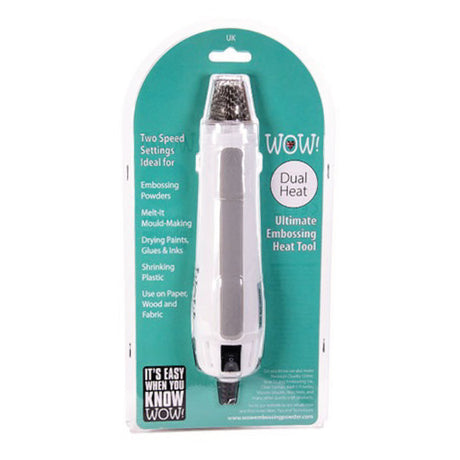
- Heat tool
- A4 die-cutting machine
INSTRUCTIONS:
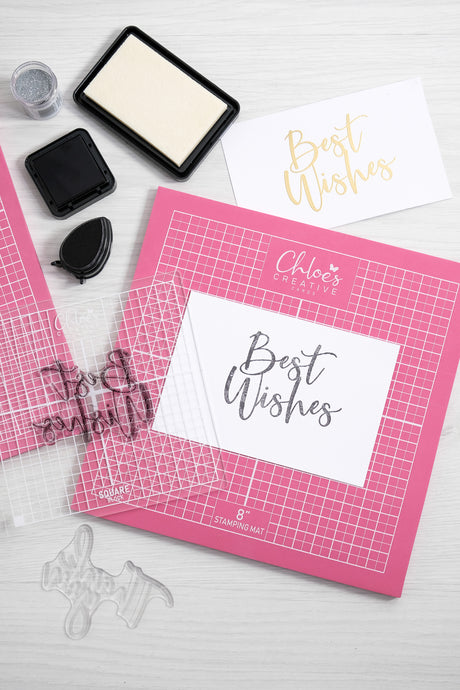
1 Trim a sheet of Rose Quartz mirror card to 7¾” square and affix to the card blank using dries-clear glue. Trim a sheet of Crystal White pearl card to 7½” square, Rose Quartz pearl card to 7¼” square and butterfly-patterned paper from the Floral Dreams paper pad to 7” square. Cover the edges of each panel with Crystallina Sparkelicious glitter, and matt and layer onto the card front using foam pads. Die-cut Rose Quartz mirror card using the third-largest die from the Fancy Ovals die set and affix to the card front using foam pads.
2 Cover a sheet of Crystal White pearl card with a double-sided adhesive sheet and die-cut using the fourth-largest die from the Fancy Ovals die set. Die-cut Rose Quartz pearl card using the Floral Happy Birthday die set.
3 Using the Happy Birthday die from the same set, die-cut the words from Rose Quartz mirror card and layer this over the pearl card die-cut panel using dries-clear glue. Remove the protective top layer from the double-sided adhesive and affix the floral die-cut panel onto the Fancy Ovals panel. Infill with Chunky Crystallina Sparkelicious glitter and affix to the card front using foam pads.
4 Die-cut four large flowers and eight medium flowers from vellum using the Flower Power dies. Using the stamps from the same set, stamp the decorative detail onto each flower using the clear inkpad, then cover with Sparkling Snow embossing powder and heat set. Add colour to the reverse of the flowers using the marker pen.
5 Add dots of dries-clear adhesive to the tips of the petals of each flower and sprinkle with Chunky Crystallina Sparkelicious glitter. Shape the petals to look more natural and add colour to the reverse using the marker pen. Layer up the flowers, as shown, using 3D glue gel. Add a 12mm Sparkler to the centre of each of the large flowers and 10mm Sparklers to the centres of each of the medium flowers using glue gel. Affix the flowers around the central die-cut panel, as shown, using 3D glue gel.
6 Die-cut four pieces of Rose Quartz pearl card using the Swirly Foliage die set. Add some Self-Adhesive sparkles to the swirly elements and affix to the card around the flowers using 3D glue gel. Stamp six fronds from the Chloe’s Classics Volume 3 stamp set onto heat-resistant acetate using clear ink, cover with Opaque Bright White embossing powder and heat set. Add dots of dries-clear glue along the length of each frond and cover with Pink Perfection Sparkelicious glitter. Once the glue has dried, cut out the fronds by hand and affix around the flowers, as shown, using glue gel. Affix some Sparkling Silvers Self-Adhesive Sparkles to the centre die-cut panel to finish.


I hope you've found this beautiful card tutorial informative and that it's inspired you to create your own version!
Remember to share your creations on our Facebook and Instagram pages and follow us to keep up to date with all the latest news and collections.
Chloe x