Hello Crafters,
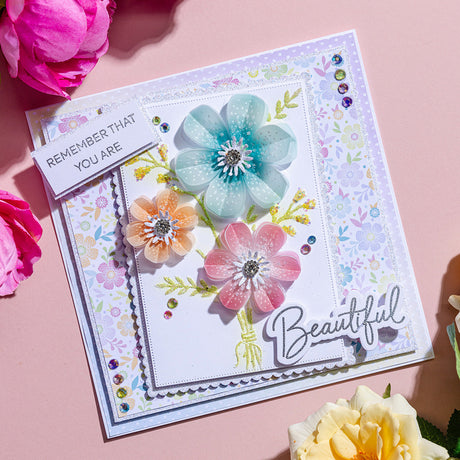
Today, we're bringing you this pretty and delicate butterfly decagon-shaped card tutorial created by the talented Rebecca. Rebecca has chosen the versatile Floral Frames and Flutters collection for her card design, and we adore everything about it, from the colours to the composition.
Read on for a full step-by-step project tutorial, complete with linked materials list.

YOU WILL NEED:
- Die and stamp set – Beautiful Butterfly Frame
- Nesting die set – Basic Decagon
- A4 printed paper pad – Leafy Lace
- 8x8” printed paper pad – Fabulous Florals and Flutters
- Luxury white vellum
- A4 white card
- Sparkelicious glitter – Diamante Sparkle and Crystallina
- WOW! embossing powder – Polished Silver Superfine and Opaque Bright White
- Sparklers – 10mm
- Self-adhesive Sparkles – Beautiful Blues, Pretty Purples and Pretty Pinks
- Luxury pearl card – Crystal White
- White organza ribbon
- Ranger Distress Oxide inkpads – Stormy Sky, Picked Raspberry and Shaded Lilac
- WOW! clear embossing inkpad
- Foam pads on a roll
- Chisel-tip glue pen
- Pinflair 3D glue gel
- Art Glitter Dries-clear glue with a fine-tip applicator
- 8x8” white straight-edged card blank
- WOW! heat tool
- Die-cutting machine
INSTRUCTIONS:
1 Die-cut the largest decagon from an 8x8” card blank to create a shaped card. Remember to overhang the die slightly on the card spine. Die-cut the same die from white cardstock, then edge it with glue using a chisel-tip glue pen and cover it with Crystallina Sparkelicious glitter. Adhere to the front of the card blank using dries-clear glue.
2 Die-cut the second and third decagon dies from sheets of printed paper and affix to the card using foam pads. Die-cut the fourth decagon die from patterned paper and affix it to the card using dries-clear glue. Die-cut the ninth and tenth decagon from printed papers, then edge the tenth decagon panel with Crystallina Sparkelicious glitter and affix both to the card.
3 Stamp out the butterfly frame onto Crystal White pearl card using a clear embossing inkpad and then heat-emboss using Polished Silver embossing powder. Die-cut using the coordinating die. Infill the leaves with dries-clear glue and cover in Diamante Sparkle Sparkelicious glitter. Affix to the card using foam pads.
4 Stamp out the frame again onto sheets of blue, lilac and pink printed paper using a clear embossing inkpad and then heat-emboss using Opaque Bright White embossing powder. Die-cut using the coordinating dies. Shape the wings and affix to the card using a couple of each colour. Stamp the frame again onto white vellum and heat-emboss using Opaque Bright White embossing powder. Ink from behind using Oxide inks to match the butterflies already on the card. Die-cut using the coordinating dies, then shape the wings and affix to the card. Add a few self-adhesive sparkles to decorate the butterflies.
5 Die-cut a small decagon from pink printed paper and edge with Crystallina Sparkelicious glitter. Affix to the centre of the frame using foam pads. Die-cut a smaller decagon from Crystal White pearl card, then stamp out the sentiment using a clear embossing inkpad and heat-emboss using Polished Silver embossing powder. Tie a bow and affix it to the card using 3D glue gel. Add a sparkler to the centre to finish.


Remember to share your creations on our Facebook and Instagram pages and follow us to keep up to date with all the latest news and collections.
Chloe x


